If you are a beginner looking for a rewarding, adorable project that looks advanced but is actually simple to build piece-by-piece, you have found the right guide! Crocheting an amigurumi animal is one of the most satisfying crafts in the world.
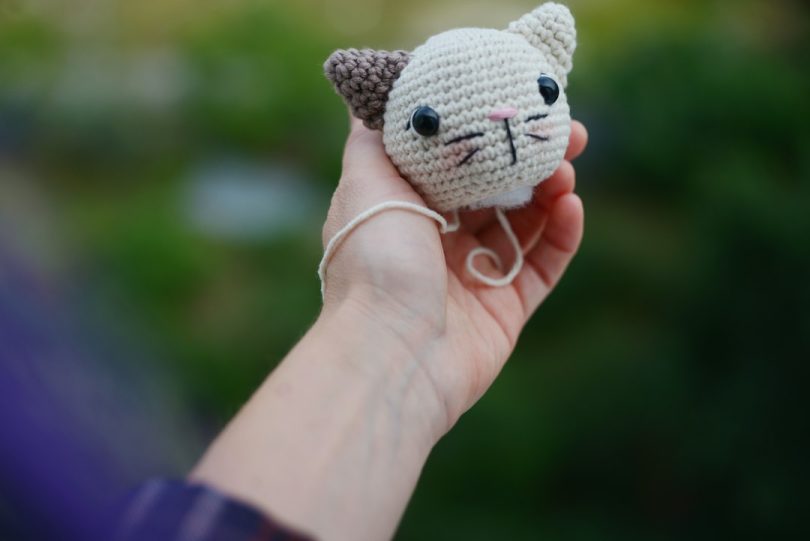
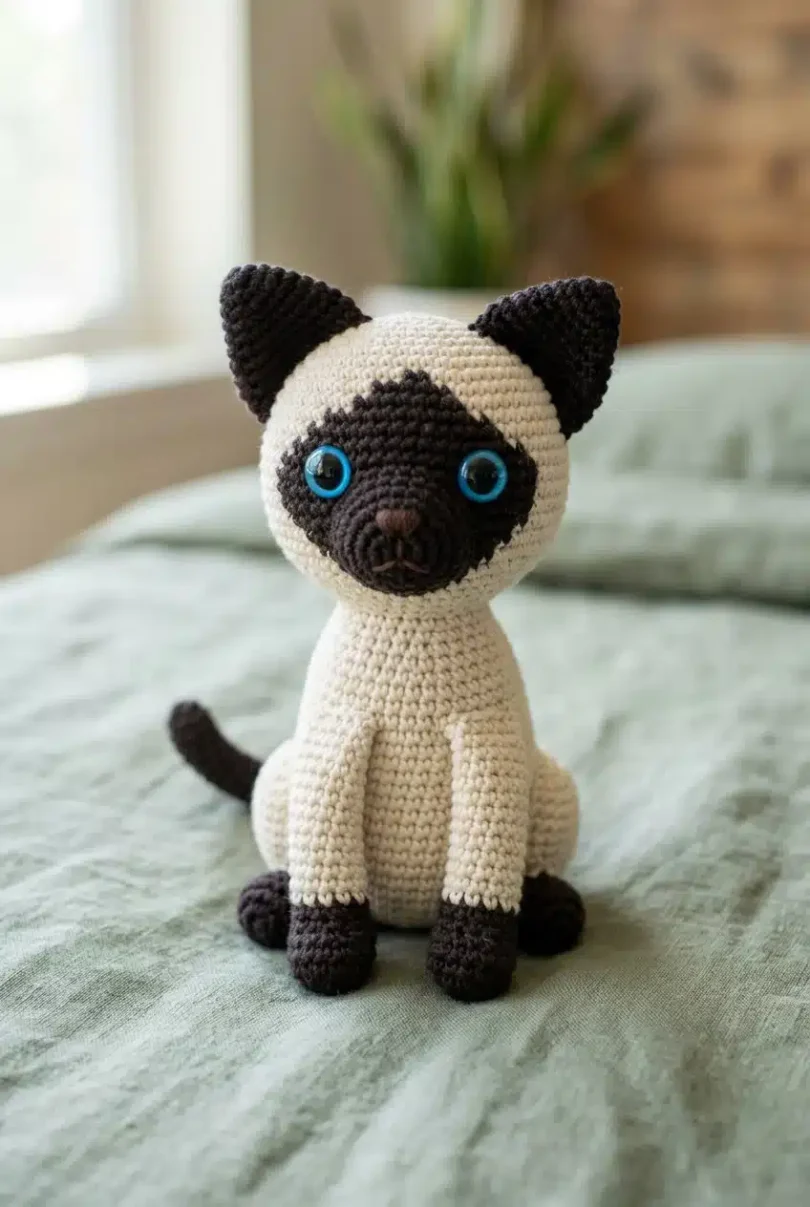
Today, we are breaking down the Free Amigurumi Siamese Cat Crochet Pattern . Known for their striking blue eyes, pale cream coats, and dark “color-point” masks, ears, and paws, Siamese cats make breathtaking handmade plushies .
Don’t worry if you are new to amigurumi. This guide is written with beginner-friendly explanations, clear stitch breakdowns, and pro-tips to ensure your little feline friend turns out looking professionally made!
1. Pattern At-A-Glance
- Skill Level: Beginner–Intermediate (Very accessible if you know basic single crochets)
- Finished Size: Approximately 6 inches tall using the recommended yarn and hook
- Yarn Weight: Worsted Weight (Category 4) acrylic yarn
- Hook Size: US G/6 (4.0mm) crochet hook
- Time to Complete: 4–8 hours total
- Key Techniques: Magic ring, increases, invisible decreases, working in continuous rounds
2. Materials & Tools Needed
Before you begin, gather your supplies. Using the right colors is the secret to getting that authentic Siamese look!
- Yarn:
- Cream/Ivory (Body Color): Approx. 80 yards (e.g., Lion Brand Vanna’s Choice in “Linen”). Used for the head, body, and upper limbs.
- Seal Brown (Color Points): Approx. 40 yards (e.g., Red Heart Super Saver in “Coffee”). Used for the ears, facial mask, lower legs, and tail tip.
- Soft Pink (Optional): Approx. 5 yards for the inner ear shading.
- Tools & Notions:
- US G/6 (4.0mm) crochet hook
- Polyfill fiberfill stuffing
- Two 9mm black safety eyes [cite: 56]
- Tapestry needle for weaving and sewing
- Stitch marker (essential for marking the start of your rounds!)
- Scissors & straight pins
- Black and white embroidery floss (for nose, whiskers, and face details)
3. Beginner Stitch Guide & Abbreviations
All instructions follow standard US crochet terminology. If you are a beginner, keep this quick reference guide close by:
- MR: Magic ring (the adjustable loop used to start round items)
- ch: Chain stitch
- sl st: Slip stitch
- sc: Single crochet (the primary stitch used throughout)
- inc: Increase (work 2 single crochets into the same stitch to make your piece grow)
- dec: Decrease (combine 2 stitches into 1 to shrink your piece)
- BLO: Back loop only
- st(s): Stitch(es)
- rnd: Round
- rep: Repeat instructions inside parentheses
- FO: Fasten off
- PM: Place marker
💡 Beginner Pro-Tip (The Invisible Decrease): When decreasing to shape your cat’s face or limbs, use an invisible decrease. Insert your hook through the front loops only of the next two stitches, yarn over, pull through both loops, and finish your single crochet. This keeps your stitches smooth with zero gaps!
4. Step-by-Step Instructions (Piece by Piece)
Note: Most pieces are worked in continuous rounds without joining with a slip stitch. Always place a stitch marker at the very first stitch of every round and move it up as you go.
1. The Head (Cream Yarn)
The Siamese has a distinct wedge-shaped head.
- Rnd 1: MR, 6 sc into ring. [6]
- Rnd 2: Inc in each st around. [12]
- Rnd 3: (Sc 1, inc) x 6. [18]
- Rnd 4: (Sc 2, inc) x 6. [24]
- Rnd 5: (Sc 3, inc) x 6. [30]
- Rnd 6: (Sc 4, inc) x 6. [36]
- Rnd 7: (Sc 5, inc) x 6. [42]
- Rnds 8–12: Sc around (5 rows total). [42]
- 🛑 Eye Placement: Place your 9mm safety eyes between Rnds 10 and 11, about 8 stitches apart.
- Rnd 13: (Sc 5, dec) x 6. [36]
- Rnd 14: (Sc 4, dec) x 6. [30]
- Rnd 15: (Sc 3, dec) x 6. [24]
- Stuff the head firmly right now before the opening gets too small!
- Rnd 16: (Sc 2, dec) x 6. [18]
- Rnd 17: (Sc 1, dec) x 6. [12]
- Rnd 18: Dec x 6. [6]
- FO, leaving a 12-inch tail for sewing. Thread the tail through the remaining stitches to close tightly.
2. The Ears (Make 2 – Two Layers Each)
Siamese cats have large, dramatic ears! You will make an outer cream layer and an inner brown layer, then sew them together.
- Outer Ear (Cream):
- Rnd 1: MR, 4 sc into ring. [4]
- Rnd 2: Inc in each st around. [8]
- Rnd 3: (Sc 1, inc) x 4. [12]
- Rnd 4: Sc around. [12]
- Rnd 5: (Sc 2, inc) x 4. [16]
- Rnd 6: Sc around. [16]. FO with a 12-inch tail. Flatten into a triangle (do not stuff).
- Inner Ear (Seal Brown):
- Rnds 1–3: Repeat Rnds 1–3 of the outer ear [12]. FO with an 8-inch tail.
- Assembly: Whip-stitch the small brown triangle onto the front of the cream outer ear.
3. The Body (Cream Yarn)
The Siamese body is long, slender, and elegant.
- Rnds 1–5: Follow the same increase pattern as the head (MR 6 -> 12 -> 18 -> 24 -> 30 sc). [30]
- Rnds 6–10: Sc around. [30]
- Rnd 11: (Sc 3, dec) x 6. [24]
- Rnds 12–14: Sc around. [24]
- Rnd 15: (Sc 2, dec) x 6. [18]
- Rnd 16: Sc around. [18]. Stuff the body firmly.
- Rnd 17: (Sc 1, dec) x 6. [12]
- Rnd 18: Dec x 6. [6]. FO and close the hole with your yarn tail.
4. Front & Back Legs (Make 2 of Each)
Legs start with dark seal brown paws and transition into the pale cream upper leg.
- Front Legs:
- Begin with Seal Brown: Rnd 1: MR, 6 sc [6]. Rnd 2: Inc in each st [12]. Rnds 3–4: Sc around [12]. Rnd 5: (Sc 2, dec) x 3 [9].
- Switch to Cream: Rnds 6–12: Sc around [9]. Stuff lightly, flatten the top, and FO with a 10-inch tail.
- Back Legs:
- Begin with Seal Brown: Rnds 1–4: Work like front legs, but add an extra
Sc aroundrow at Rnd 5 so they are slightly longer [12]. Rnd 6: (Sc 2, dec) x 3 [9]. - Switch to Cream: Rnds 7–14: Sc around [9]. Stuff lightly, flatten the top, and FO with a 10-inch tail.
- Begin with Seal Brown: Rnds 1–4: Work like front legs, but add an extra
5. The Tail (Cream transitioning to Seal Brown)
- Begin with Cream: MR, 4 sc into ring [4]. Rnds 1–15: Sc around [4].
- Switch to Seal Brown: Rnds 16–20: Sc around [4]. Leave an unstuffed, floppy tail and FO with a 10-inch tail.
5. How to Assemble Your Siamese Cat Amigurumi
Assembly is where your yarn pieces magically transform into a living cat! Always pin pieces in place with straight pins before sewing.
- The Facial Mask: Before attaching the head, use seal brown yarn on a tapestry needle to embroider a downward “V” shape between the ears down to the eyes, filling it in with dense satin stitches. Add a small black triangle nose.
- Attach the Head: Sew the head onto the top of the body with a slight forward tilt.
- Attach the Ears: Pin the large ears wide apart at the outer top edges of the head, angled slightly outward.
- Attach the Limbs: Sew the front legs to the upper chest and the back legs lower down to create a seated posture.
- Attach the Tail: Sew the base of the tail to the lower back, curving it gracefully to one side.
- Whiskers: Add 3 short white or cream embroidery floss lines on each side of the muzzle.
6. Top Tips for Beginners
- Keep your tension tight: If your stitches are too loose, the polyfill stuffing will poke through the pale cream yarn. Pull your yarn snugly on every stitch!
- Color changes: When switching from brown to cream on the legs, always make the final pull-through of the last brown stitch using the new cream yarn. This prevents messy, blurry lines.
- Embrace the process: Take your time with the facial embroidery—it gives your Siamese its unique personality!