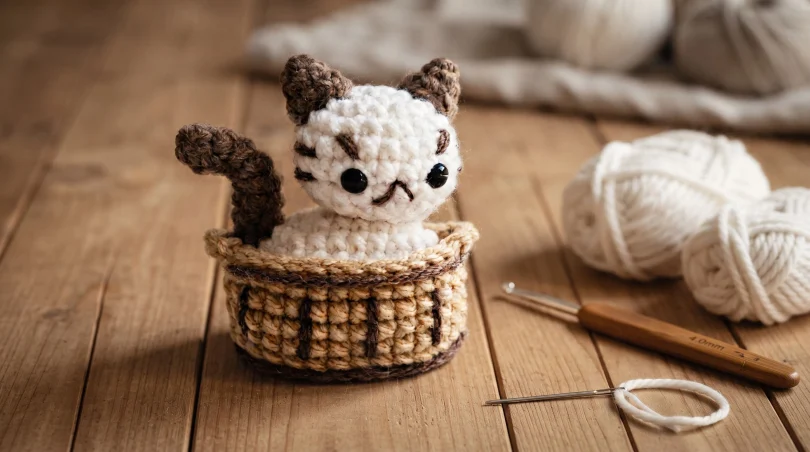
Welcome to another delightful and adorable amigurumi project! If you love working on quick, charming patterns that turn out irresistibly cute, you are going to love this tiny feline. Today we will guide you step by step through how to crochet an
Adorable White Baby Kitty Sitting in a Basket, originally designed by
viik.home.
While this sweet little cat looks compact and tiny, if you choose to work it up using chunky plush yarn, it can transform into a wonderfully huggable size. Featuring simple beginner-friendly construction, separate pieces, and a cute little woven basket to sit inside, this pattern is designed to be clear, engaging, and easy to follow.
Why You Will Love This Kitty in a Basket Pattern
Amigurumi projects that feature little accessories—like this cozy sitting basket—are always a massive hit. They make fantastic handmade gifts, wonderful desk decorations, or lovely keepsakes. Because the instructions are broken down cleanly into individual parts like the head, body, ears, tail, and basket, you can easily track your progress and assemble your cute creation with zero hassle.
Materials & Tools Needed
Before you get your hook ready, make sure you have gathered all the necessary supplies to bring your kitty and basket to life:
- Yarn: Any yarn of your choice (Recommended: Plush or chenille yarn for a soft texture; white or brown tones recommended for the cat).
- Crochet Hook: Matching your chosen yarn weight.
- Toy Stuffing (Fiberfill): To give shape to the head, body, and tail.
- Sewing / Tapestry Needle: For weaving in ends and assembling the pieces.
- Scissors: For cutting yarn cleanly.
- Stitch Marker: Essential for keeping track of your rounds in spiral work.
- Wire (Optional): Can be placed inside the tail to help shape it dynamically.
- Safety Eyes (Optional): Small safety eyes or beads for the facial features.
Key Crochet Abbreviations
To read and follow this pattern smoothly, keep this standard abbreviation guide handy:
- R / Rnd: Round
- Mr: Magic Ring
- Sc: Single Crochet
- Inc: Increase (two single crochets in the same stitch)
- Dec: Decrease (crochet two single crochets together)
- Slst: Slip Stitch
- Ch: Chain
- Blo: Back Loops Only
- FO: Fasten Off
- St: Stitch
- [x]: Total stitches at the end of the round
Step-by-Step Amigurumi Pattern
Let’s break down the pattern piece by piece, starting with the small details and working our way up to the basket.
1. Ears (Make 2 – In Brown Yarn)
We begin the cat toy with the ears. This piece is worked for a total of 3 rounds using only increases. No stuffing is required for the ears.
- R1: 4 sc in mr [4]
- R2: (inc, 1 sc) repeat 2 times [6]
- R3: (inc, 2 sc) repeat 2 times [8]
Fasten off (FO), and leave a long tail for sewing.
2. Tail (In Brown Yarn)
The tail is crocheted for 8 rounds. You can stuff it lightly as you go, and optionally insert a piece of wire to keep it curved and shaped.
- R1: 6 sc in mr [6]
- R2 – R8: 6 sc (7 rounds total) [6]
Fasten off (FO), and leave a long tail for sewing.
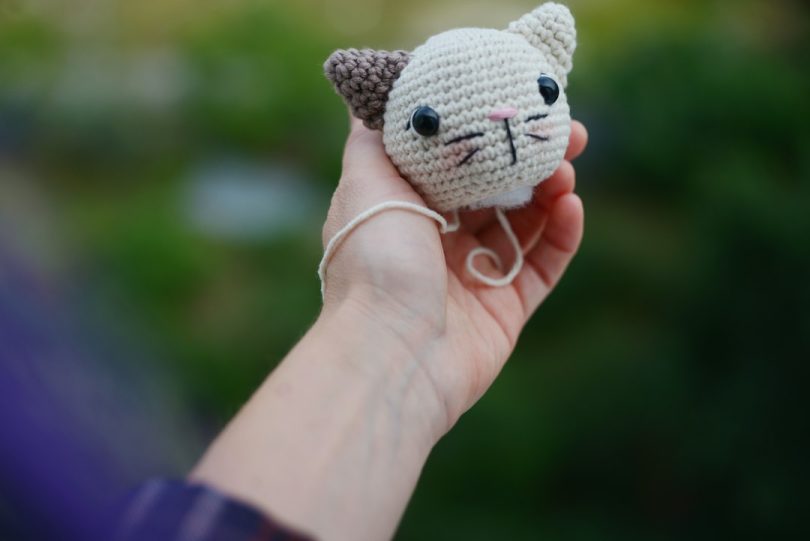
3. Head
The cat features a wonderfully symmetrical and round head built from a magic ring.
- R1: 6 sc in mr [6]
- R2: 6 inc [12]
- R3: (sc, inc) repeat 6 times [18]
- R4: (2 sc, inc) repeat 6 times [24]
- R5-R7: 24 sc (3 rounds) [24]
(If using safety eyes): Place safety eyes between rounds 6 and 7 with about 4 stitches apart.
- R8: (2 sc, dec) repeat 6 times [18]
Start filling the head firmly with fiberfill here.
- R9: (1 sc, dec) repeat 6 times [12]
- R10: 6 dec [6]
Fasten off (FO), close the hole completely, and leave a long tail for sewing.
4. Body
The body is worked for 8 rounds. Follow the steps patiently and remember to stuff the body properly as you progress.
- R1: 7 ch (starting from the 2nd chain from the hook): 5 sc, 3 sc in a single stitch, turn and work along the other side of the chain: 4 sc, 1 inc [14]
- R2: inc, 4 sc, 3 inc, 4 sc, 2 inc [20]
- R3: sc, inc, 4 sc, (sc, inc) repeat 3 times, 4 sc, (sc, inc) repeat 2 times [26]
- R4-R6: 26 sc (3 rounds) [26]
- R7: sc, dec, 4 sc, (sc, dec) repeat 3 times, 4 sc, (sc, dec) repeat 2 times [20]
- R8: dec, 4 sc, 3 dec, 4 sc, 2 dec [14]
Fasten off (FO), add final stuffing, and close the hole shut.
5. Basket (Bag)
The basket is worked for a total of 10 rounds. You do not need to stuff it, but make sure to shape it neatly so the kitten can sit comfortably inside.
- R1: 7 ch (starting from the 2nd chain from the hook): 5 sc, 3 sc in a chain, working on the other side of the chain: 4 sc, inc [14]
- R2: inc, 4 sc, 3 inc, 4 sc, 2 inc [20]
- R3: sc, inc, 4 sc, (sc, inc) repeat 3 times, 4 sc, (sc, inc) repeat 2 times [26]
- R4: 2 sc, inc, 4 sc, (2 sc, inc) repeat 3 times, 4 sc, (2 sc, inc) repeat 2 times [32]
- R5 (in Blo): 32 sc [32]
- R6-R9: 32 sc (4 rounds) [32]
- R10: 14 slst, 6 ch, skip 2 st, 14 slst, 6 ch, skip 2 st, and finish with a slst in the first stitch of the round.
Fasten off (FO) and neatly hide the yarn tail.
Assembly Instructions
Now that all the individual pieces are ready, it is time to assemble your sweet kitten:
- Ears: Sew onto rows 2–4 of the head, leaving about 6 stitches apart when counted across row 3.
- Tail: (Optional: insert a wire first to shape it) Sew securely between rounds 3–4 on one side of the body.
- Head and Body: Take round 9 of the head and sew it directly to the body between rounds 1–2 on the opposite side to where you attached the tail.
- Final Touches: Place your finished kitten inside the basket, and feel free to add any custom embroidery for the kitty’s facial expressions or surface details on the basket.
Frequently Asked Questions (FAQ)
1. What kind of yarn is best suited for this pattern?
While any yarn works wonderfully, plush or chenille yarn is highly recommended if you want your kitty to turn out exceptionally soft, squishy, and larger in size.
2. Do I need to use wire for the tail?
No, the wire is completely optional! It is only suggested if you want the tail to hold a playful, curved position.
3. Is this pattern beginner-friendly?
Yes, absolutely! The stitches are straightforward, and because the designer provides detailed assembly guidelines, beginners can easily complete this project.
Conclusion
Congratulations! You have completed your adorable White Baby Kitty Sitting in a Basket amigurumi. This charming project makes a wonderful handmade gift or a cute desktop decoration. Keep your hooks ready, experiment with your favorite colors, and enjoy your wonderful new creation!