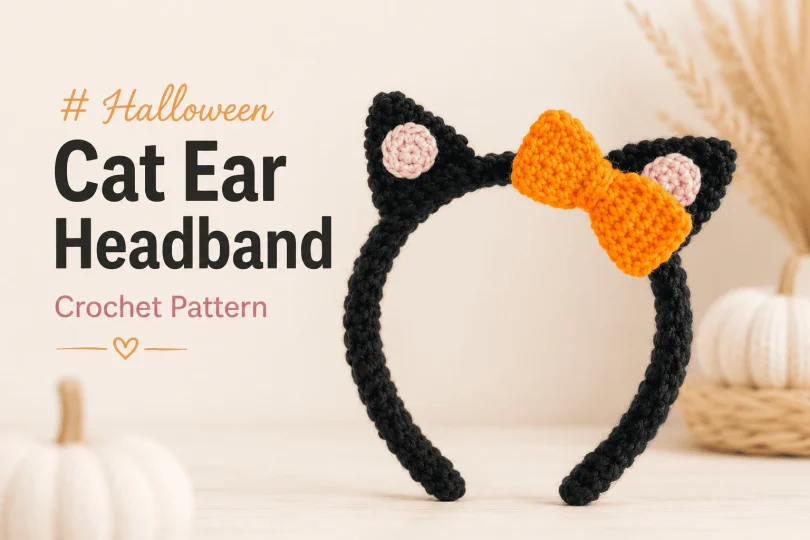
Get ready for Halloween with this quick and adorable crochet cat ear headband. Perfect for last-minute costumes or festive parties, this stash-busting project slides right over a generic plastic headband for comfortable, all-night wear. Whether you are making it for a trick-or-treat outfit or a subtle office costume, this low-sew pattern works up in just a few hours.
Materials & Tools
- Yarn: Paintbox Yarns Simply Aran in Pure Black, Seville Orange, and Blush Pink (approx. 100 yds each).
- Hook: 3.5 mm (US E).
- Hardware: A generic plastic or metal headband.
- Notions: Tapestry needle for sewing and weaving in ends.
Abbreviations (US Terms)
- Ch: Chain
- Sc: Single crochet
- Sl st: Slip stitch
- Inc: Increase (2 sc in the same stitch)
- F/o: Fasten off
Gauge: 8 sc = 3 inches.
Pattern Instructions
1. Headband Base
- Round 1: With black yarn, ch 2. Sc 6 into the 2nd ch from hook. (6)
- Round 2: Sc in each st around. (6)
- Continue to sc around in a continuous spiral until you have a tube that is long enough to fit over your entire headband.
- When you reach the other end, fasten off. Slide the crocheted tube onto the headband and weave in the ends to close the tube securely around the plastic tips.
2. Ear Base (Make 2)
- Round 1: With black yarn, ch 2. Sc 6 into the 2nd ch from hook. (6)
- Round 2: *Sc in next 2 st, inc in next st. Repeat from * once more. (8)
- Round 3: *Sc in next 3 st, inc in next st. Repeat from * once more. (10)
- Round 4: *Sc in next 4 st, inc in next st. Repeat from * once more. (12)
- Round 5: *Sc in next 5 st, inc in next st. Repeat from * once more. (14)
- Round 6: *Sc in next 6 st, inc in next st. Repeat from * once more. (16)
- Round 7: *Sc in next 7 st, inc in next st. Repeat from * once more. (18)
- Round 8: *Sc in next 8 st, inc in next st. Repeat from * once more. (20)
- Fasten off, leaving a long tail for sewing.
3. Inner Ear (Make 2)
- Round 1: With pink yarn, ch 2. Sc 6 into the 2nd ch from hook. (6)
- Round 2: Inc in each st around. (12)
- Fasten off and leave a tail for sewing.
- Assembly: Using your tapestry needle, sew this pink circle to the middle of the black ear base. Flatten the ear base, and sew it directly to the headband base, spacing each ear evenly between the ends. Weave in all ends.
4. Optional Bow
- Round 1: With orange yarn, ch 8. Turn, sc in the next ch and in each ch across. Ch 1, sc underneath each of the sc you just made, working your way back to your very first sc. (15)
- Rounds 2-18: Sc in each st around. (15)
- Round 19: Flatten your piece so that half of your last row is touching the other half. Sc through both halves to seal the piece and close the hole. (7)
- Fasten off and weave in ends.
- Center Wrap: Make a separate chain of 4 (do not fasten off). Wrap this chain around the center of your orange rectangle and sl st through the first ch to close the chain tightly around the rectangle, forming a bow shape. Fasten off and weave in ends. Sew the bow to the headband at the base of either ear, tilting it slightly for extra character.
Frequently Asked Questions
Can I use a different yarn weight for this project?
Yes, but you will need to adjust your stitch count. This pattern is designed for Aran/Worsted weight yarn. If you use a chunky velvet or chenille yarn, the ears will be much larger, and you will need fewer rounds to cover the headband tube.
How do I keep the cat ears from flopping over?
By using a smaller 3.5mm hook with Aran weight yarn, your stitches naturally become tight and stiff, which helps the ears stand up perfectly on their own. Sewing them securely through multiple stitches on the headband tube also keeps them firmly anchored.
This cute cat ear headband is the ultimate quick-fix costume accessory that you can wear year after year. Block your ears slightly with your fingers to sharpen the points, and you are entirely ready for your spooky season parties. What color will you choose for your custom bow?