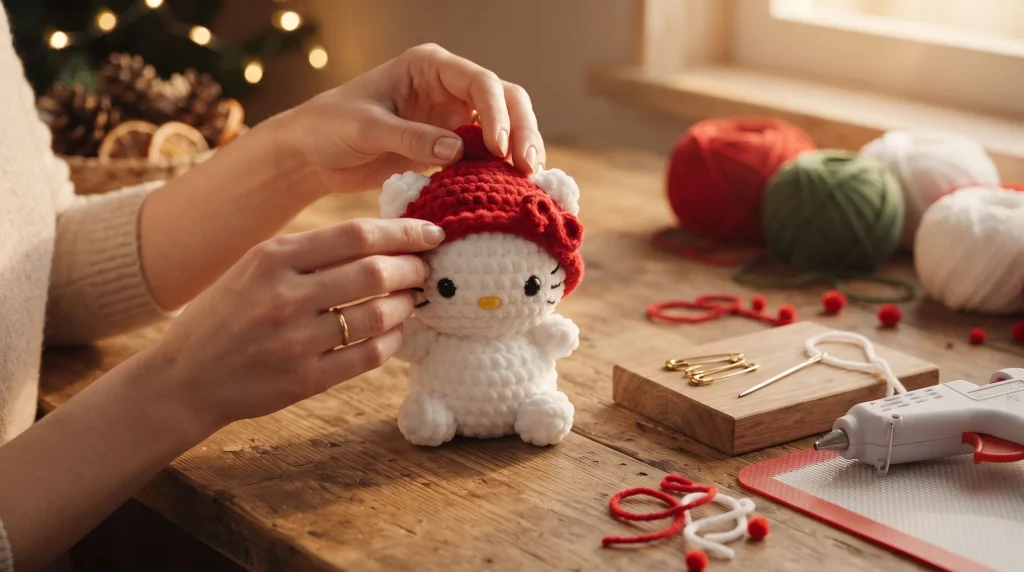
What happens when you combine the festive charm of a classic snowman with the irresistible cuteness of Hello Kitty? You get the ultimate holiday crochet project! If you love working on sweet, cozy plushies that bring instant festive cheer, this
Hello Kitty Snowman Amigurumi is about to become your favorite seasonal craft[cite: 2]. Designed by the talented
em1crochets, this pattern transforms a simple round snowman base into an iconic character with just a few clever details[cite: 2].
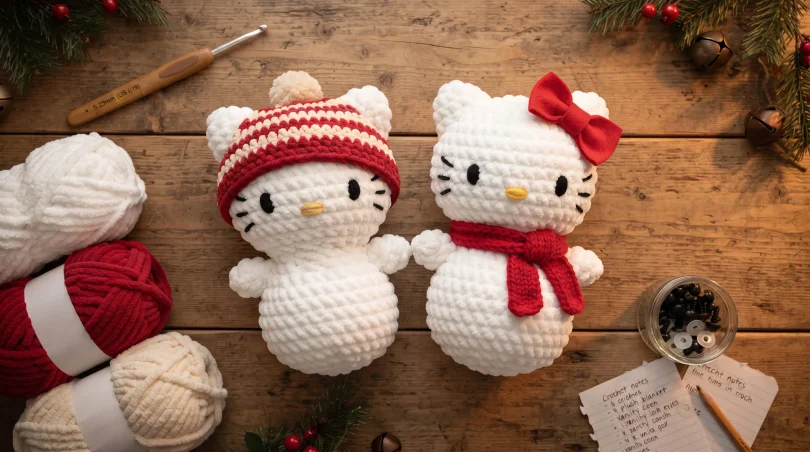
One of the best features of this pattern is its versatility! You can customize your plushie by choosing between two distinct styles[cite: 2]:
- Variation 1 (Bonnet Style): Features a cozy, textured red and vanilla Christmas bonnet with ears attached directly onto the hat[cite: 2].
- Variation 2 (Classic Scarf & Bow Style): Features the classic Hello Kitty look with her signature red ear bow and a tied holiday scarf around her neck[cite: 2].
Quick Pattern Overview
- Designer: em1crochets[cite: 2]
- Skill Level: Beginner to Easy Intermediate[cite: 2]
- Project Type: Holiday Plushie / Seasonal Amigurumi[cite: 2]
- Estimated Time: 2 to 3 hours (depending on your speed)
Materials & Tools Needed
Before grabbing your hook, gather the following yarn and supplies to bring your Hello Kitty Snowman to life[cite: 2]:
- Yarn (Plush / Chenille): Bernat Blanket Yarn (or any super bulky chenille/velvet yarn)[cite: 2].
- White: For the main head, body, and arms[cite: 2].
- Vanilla: For the fluffy trim on the bonnet (Bonnet Variation)[cite: 2].
- Cranberry (Red): For the bonnet, bow, scarf, and bonnet-style ears[cite: 2].
- Crochet Hook: 5.25 mm crochet hook (Size I-9)[cite: 2].
- Safety Eyes: Used uniquely as buttons on the snowman’s body[cite: 2].
- Felt Details: Black felt (for the eyes and whiskers) and yellow felt (for the nose)[cite: 2].
- Hot Glue: Essential for securely attaching the felt face pieces and the bow[cite: 2].
- Sewing / Tapestry Needle: For assembling the pieces together[cite: 2].
- Stuffing: Fiberfill stuffing for the head and body[cite: 2].
Key Crochet Abbreviations
To follow this
pattern smoothly, keep this standard guide to abbreviations handy[cite: 2]:
- MR: Magic Ring[cite: 2]
- Sc: Single Crochet[cite: 2]
- Inc: Increase (2 single crochets in the same stitch)[cite: 2]
- Dec: Decrease (single crochet 2 stitches together)[cite: 2]
- BLO: Back Loop Only[cite: 2]
- Ch: Chain[cite: 2]
- slst: Slip Stitch[cite: 2]
- FO: Fasten Off[cite: 2]
Step-by-Step Pattern: Base Pieces (Common for Both Variations)
These core pieces create the main structure of your Hello Kitty Snowman. You will make these exact base parts regardless of whether you choose the Bonnet or the Scarf variation!
4.1. Head
Work in continuous rounds using White yarn. Remember to stuff the head firmly as you decrease!
- R1: MR 7[cite: 2] (7)[cite: 2]
- R2: Inc 7[cite: 2] (14)[cite: 2]
- R3: (sc, inc) x7[cite: 2] (21)[cite: 2]
- R4: (2 sc, inc) x7[cite: 2] (28)[cite: 2]
- R5: (3 sc, inc) x7[cite: 2] (35)[cite: 2]
- R6-R11: sc all around[cite: 2] (6 rows total)[cite: 2] (35)[cite: 2]
- R12: (3 sc, dec) x7[cite: 2] (28)[cite: 2]
- R13: (2 sc, dec) x7[cite: 2] (21)[cite: 2]
- R14: (sc, dec) x5[cite: 2] (16)[cite: 2]
Fasten off (FO) leaving a long yarn tail for sewing[cite: 2]. Stuff the head firmly with fiberfill.
4.2. Body
Work in continuous rounds starting with White yarn. Stuff the body firmly before closing.
- R1: MR 8[cite: 2] (8)[cite: 2]
- R2: Inc 8[cite: 2] (16)[cite: 2]
- R3: (sc, inc) x8[cite: 2] (24)[cite: 2]
- R4: (2 sc, inc) x8[cite: 2] (32)[cite: 2]
- R5: (3 sc, inc) x8[cite: 2] (40)[cite: 2]
- R6-R13: sc all around[cite: 2] (8 rows total)[cite: 2] (40)[cite: 2]
- R14: (3 sc, dec) x8[cite: 2] (32)[cite: 2]
- R15: (2 sc, dec) x8[cite: 2] (24)[cite: 2]
- R16: (sc, dec) x8[cite: 2] (16)[cite: 2]
Fasten off (FO) leaving a short tail[cite: 2]. Stuff the body thoroughly.
4.3. Arms (Make 2)
Work in White yarn[cite: 2]. These little rounded hands do not need heavy stuffing.
- R1: MR 6[cite: 2] (6)[cite: 2]
- R2: (2 sc, inc) x2[cite: 2] (8)[cite: 2]
- R3-R4: sc all around[cite: 2] (2 rows total)[cite: 2] (8)[cite: 2]
Fasten off (FO) leaving a long tail for sewing[cite: 2].
Step-by-Step Pattern: Accessories by Variation
Choose the accessory set that matches your preferred style! You can craft the cozy Christmas Bonnet style or the classic Scarf and Bow style.
5.1. Ears (Make 2)
Color Note: Start with
Cranberry Red yarn if you are making the Bonnet Variation, or start with
White yarn if you are making the Scarf Variation.
- R1: MR 6 (6)
- R2: (2 sc, inc) x2 (8)
- R3: (3 sc, inc) x2 (10)
- R4: (4 sc, inc) x2 (12)
Fasten off (FO) leaving a long yarn tail for sewing.
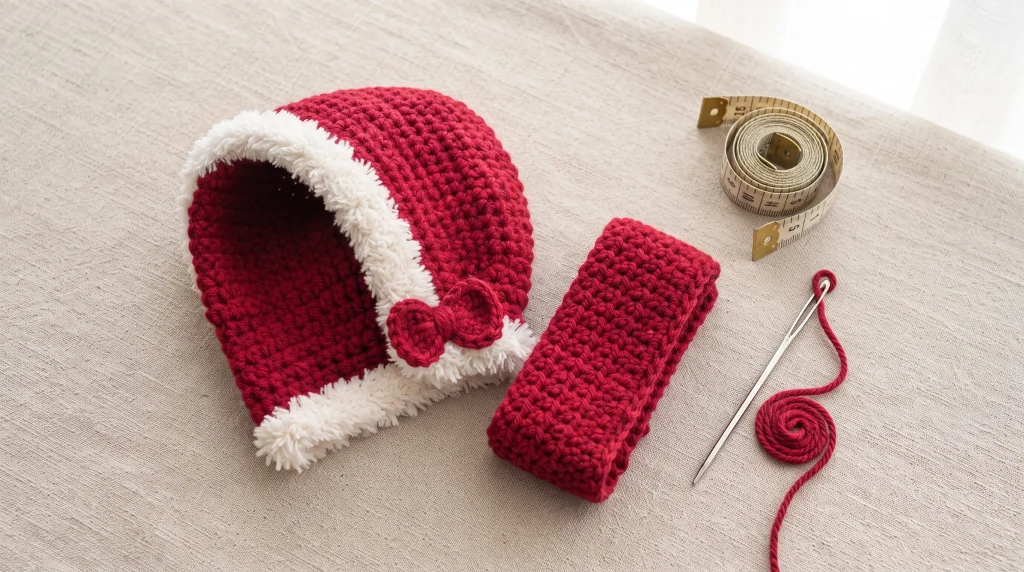
5.2. Variation A Accessories: Christmas Bonnet
(Only make this piece for the Bonnet Variation)
Start with
Cranberry Red yarn. Color changes to
Vanilla yarn are indicated in the trim steps below.
- R1: MR 6 (6)
- R2: Inc 6 (12)
- R3: (sc, inc) x6 (18)
- R4: (2 sc, inc) x6 (24)
- R5: (3 sc, inc) x6 (30)
- R6: (4 sc, inc) x6 (36)
- R7-R11: sc all around (5 rows total) (36)
- R12: Switch to Vanilla yarn: 7 sc, BLO 22 inc, 7 sc (58)
- R13: 7 sc, (slst, ch 3) x44, 7 sc (58)
- R14: 7 sc, Turn your work
- R15: Ch 1, 14 sc, ch 6, Fasten off leaving a long tail. On the opposite side, attach yarn and ch 6, then Fasten off leaving a long tail.
5.3. Variation B Accessories: Scarf & Ear Bow
(Only make these pieces for the Scarf Variation)
1. The Ear Bow:
Using
Cranberry Red yarn: In a Magic Ring (MR),
ch 2, 2 dc, ch 2, slst into MR,
ch 2, 2 dc, ch 2, slst into MR. Fasten off leaving a long tail, then wrap the tail around the middle of the bow to cinch it.
2. The Scarf:
Using
Cranberry Red yarn:
Ch 35. Fasten off leaving no tail.
Assembly Guide & Facial Details
Once all your individual pieces are crocheted, follow the specific assembly guide for the variation you chose!
6.1. Option A Assembly: Christmas Bonnet Style
- Attach Head & Arms: Sew the head securely onto the body. Next, sew the two arms on the sides, positioned right between the head and the body.
- Position the Bonnet: Place the Christmas bonnet onto the head and tie the side yarn tails into a neat bow under the chin.
- Attach Ears to Bonnet: Sew the red ears directly onto the bonnet near the front of the head.
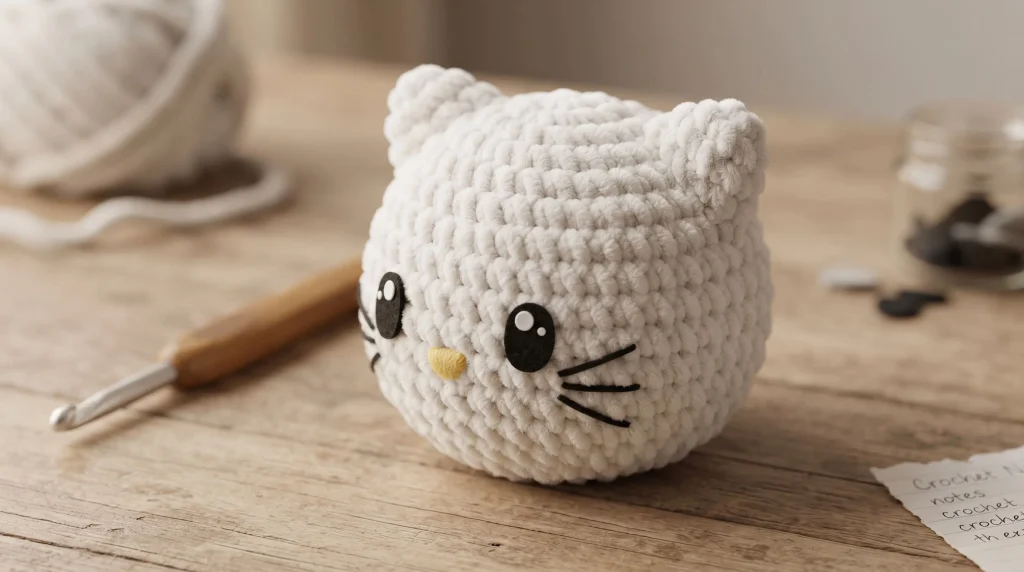
- Add Facial Features: Cut the eyes and whiskers from black felt, and the nose from yellow felt. Using hot glue, secure the facial features toward the lower portion of the head to give it that classic Hello Kitty look.
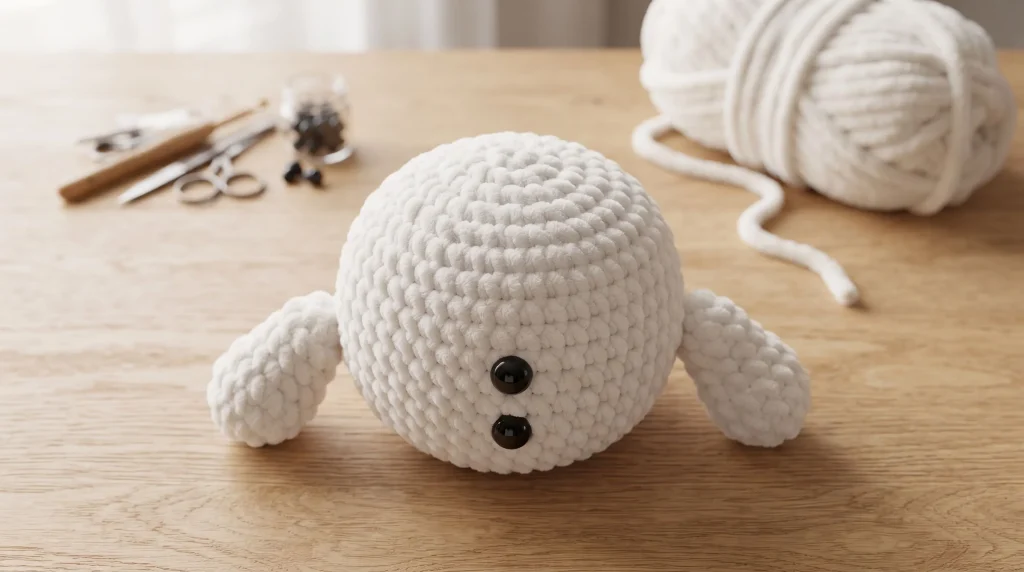
- Add Body Buttons: Place safety eyes into the body as decorative buttons, inserting them between rounds 10–11 and rounds 13–14.
6.2. Option B Assembly: Classic Scarf & Bow Style
- Attach Head & Arms: Sew the head securely onto the body. Sew the arms on the sides between the head and body.
- Attach Ears & Bow: Position the white ears between rows 4–8 on the head (leaving about 8–10 stitches apart) and sew them in place. Hot glue the red bow onto the right ear.
- Tie the Scarf: Wrap the red chain scarf around her neck and tie it securely.
- Add Facial Features: Glue the black felt eyes, whiskers, and yellow felt nose onto the lower portion of the head.
- Add Body Buttons: Place safety eyes into the body as buttons, positioning them between rounds 10–11 and rounds 13–14.
Frequently Asked Questions (FAQ)
1. Can I use cotton or acrylic yarn instead of blanket/chenille yarn?
Yes, absolutely! You can use worsted weight cotton or acrylic yarn instead of plush blanket yarn. Keep in mind that using thinner yarn will result in a significantly smaller amigurumi plushie, so you will need to downsize your crochet hook accordingly (typically to a 2.5 mm – 3.5 mm hook).
2. What is the best way to attach the felt face details if I don’t have hot glue?
If you prefer not to use hot glue, fabric glue or clear craft glue works wonderfully. Alternatively, you can hand-sew the felt pieces using a sharp needle and matching black and yellow embroidery thread, or embroider the features directly onto the head with yarn.
3. Why are safety eyes placed on the body instead of the face?
In this creative design, the safety eyes serve as decorative coal/buttons on the snowman’s belly! The facial features (eyes, nose, and whiskers) are crafted from felt to capture Hello Kitty’s flat, iconic expression accurately.
Good luck with your crochet project! Take your time, enjoy every stitch, and have fun bringing this cute festive plushie to life.